
A USB drive is a portable data storage device that can be inserted into a USB port on a computer or a USB port on a portable device such as a phone or tablet. A USB drive is an external storage device that can be connected to a computer later.
USB flash drives, in addition to the standard storage device format, are frequently used as portable media devices for storing, organizing, and sometimes transporting large amounts of data. A USB flash drive is also commonly used by students, business executives, government officials, and web designers, among others.
Taking your Windows system to a USB flash drive to boot on any PC is quite possible. The feature, called Windows To Go, has been integrated for the first time in Windows 8. In principle only for Enterprise and Education versions of Windows, However, the creation of a Windows To Go USB stick is possible with all versions of the Microsoft operating system using third-party software.
To take advantage of this, you will need to equip yourself with a USB key with at least 32 GB of USB 3.0 storage space. Choose high-performance storage media to keep the operating system running smoothly.
If you need to use your Windows installation on another computer, you can copy it to a USB drive and use it on any computer. This is also useful if you want to keep your old installation but only use it once in a while. This guide will walk you through the process of transferring your installation to a USB drive and using it on other computers. You must repeat the installation process on each computer, but once installed, the USB drive can be used on any computer.
1.Download ISO from Windows
Before you start, you will need to download the installation disk image of the version of Windows you want to use (and for which you have a license key). To do this, you can use the Windows ISO Downloader software which makes it easy to download the disk image from Windows.
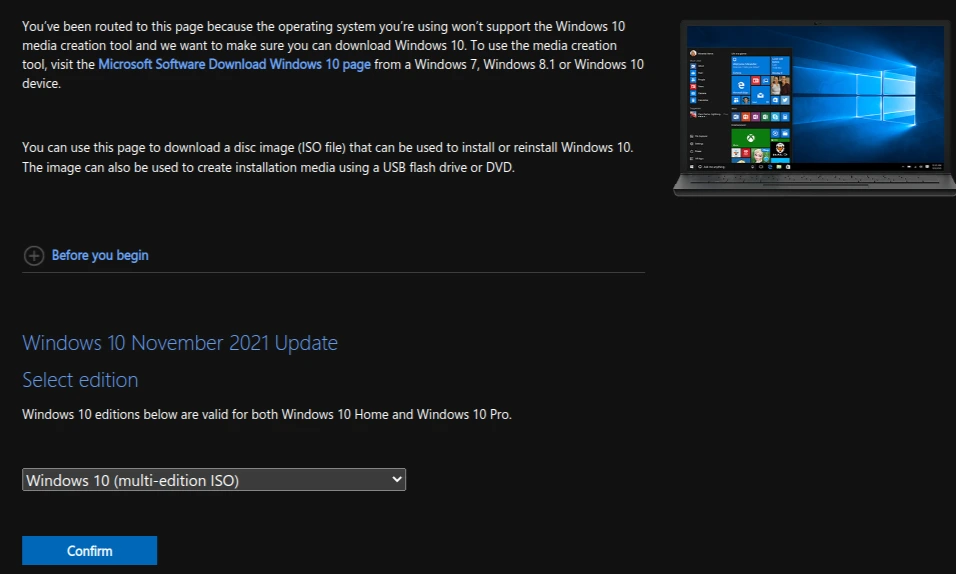
Launch the program, move the advertisement window displayed on the screen and select the Windows version you want to download. Choose an edit, press Confirm, then select the language of the disk image you want to recover before clicking Confirm.
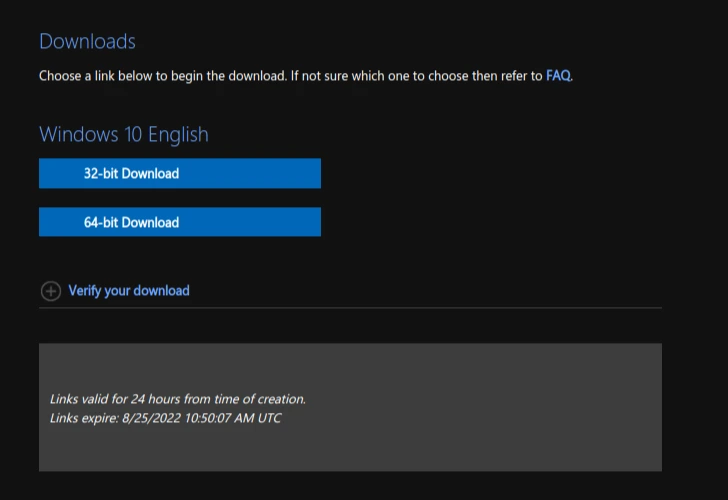
Finally, click 32 or 64 bits depending on the Windows version you want to get and confirm the download by clicking Save.
2.Download Flashboot
To install Windows on the USB drive so that a computer can boot the system directly from it, you will need the Flashboot utility. The free version of the software offers the possibility to create bootable USB keys, but also to proceed with the complete installation of the Microsoft operating system on the key in order to boot a computer on it.
Download Flashboot for Windows (Free)
3.Identify the BIOS of the machine that will run Windows To Go
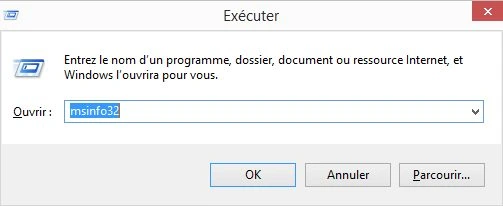
To find out if your computer is in BIOS or UEFI mode, press the Windows+R key combination and then in the Run window, type msinfo32
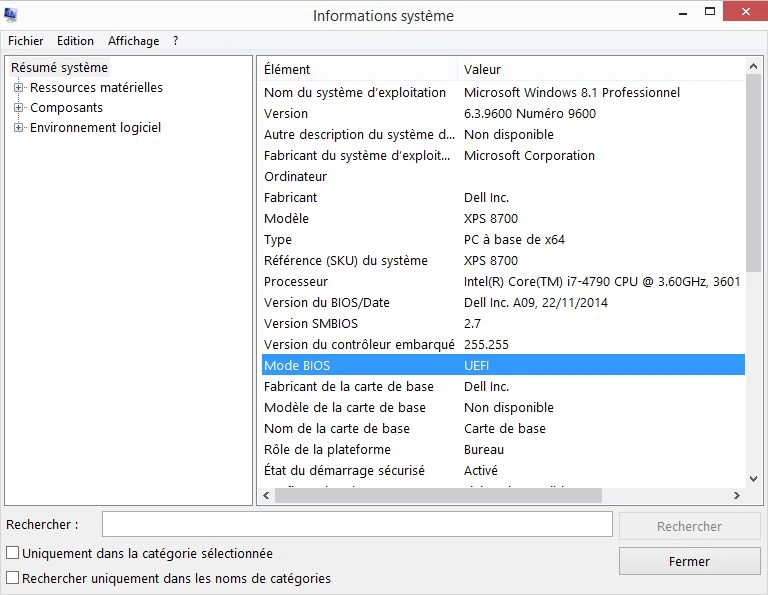
In the System Information window that opens, locate the BIOS Mode line. If the value displays UEFI, your PC is in UEFI mode. If your PC is in Bios mode, the value will display Inherited.
4.Create the USB Media
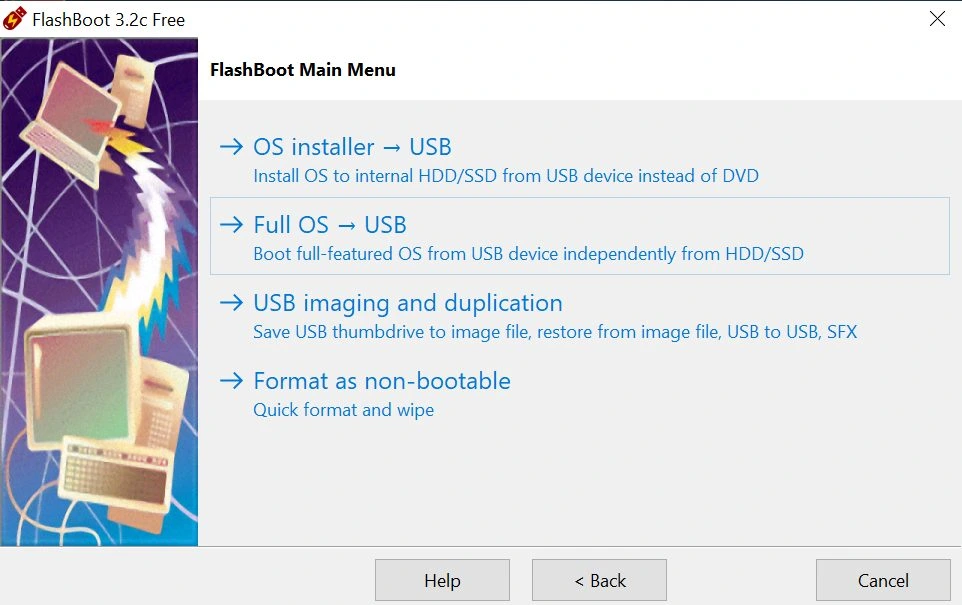
Connect the USB drive to your PC and open Flashboot. On the first page of the program wizard, click Next and then select Full OS -> USB.
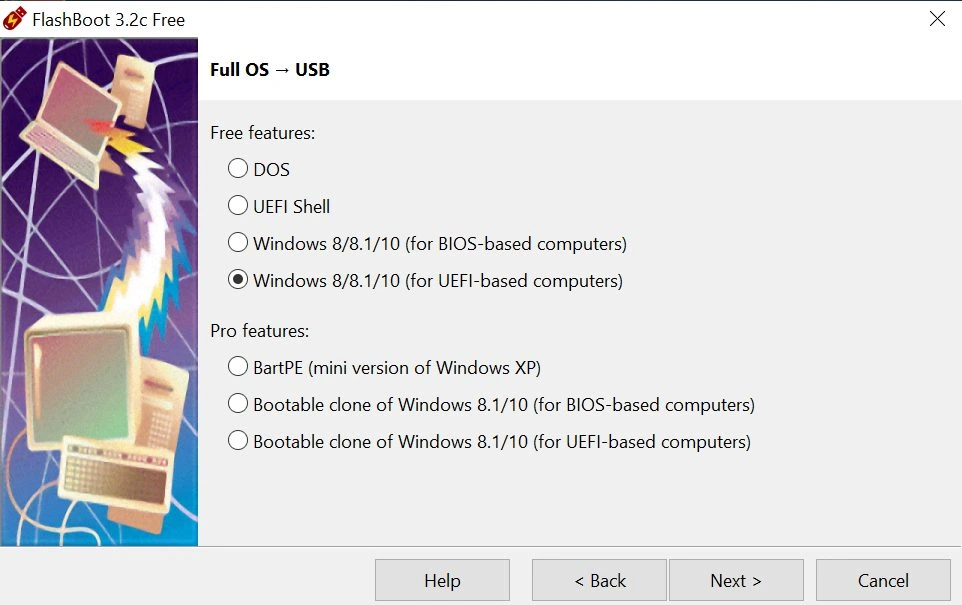
The following window shows the options available in the free version of the program (Free Features) but also in the paid professional version. We will only be interested in free options. Depending on the mode used by the computer running Windows To Go, BIOS or UEFI, select Windows 8/8.1/10 (for BIOS-based computers) or Windows 8/8.1/10 (for UEFI-based computers) and click Next.
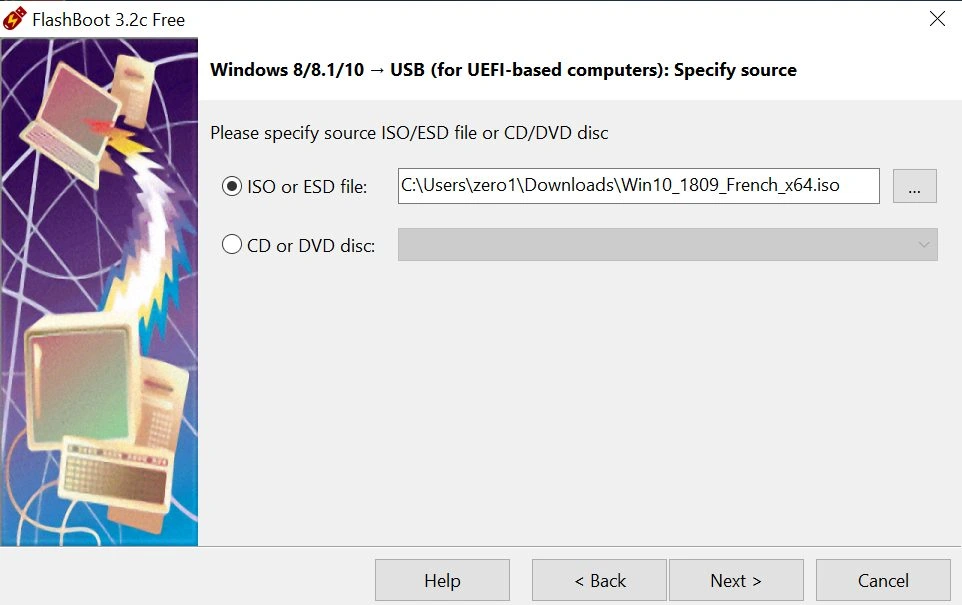
Then select ISO or ESD File and click the three small dots to open the file explorer and choose the Windows installation disk image that you previously downloaded. Validate by clicking Next.
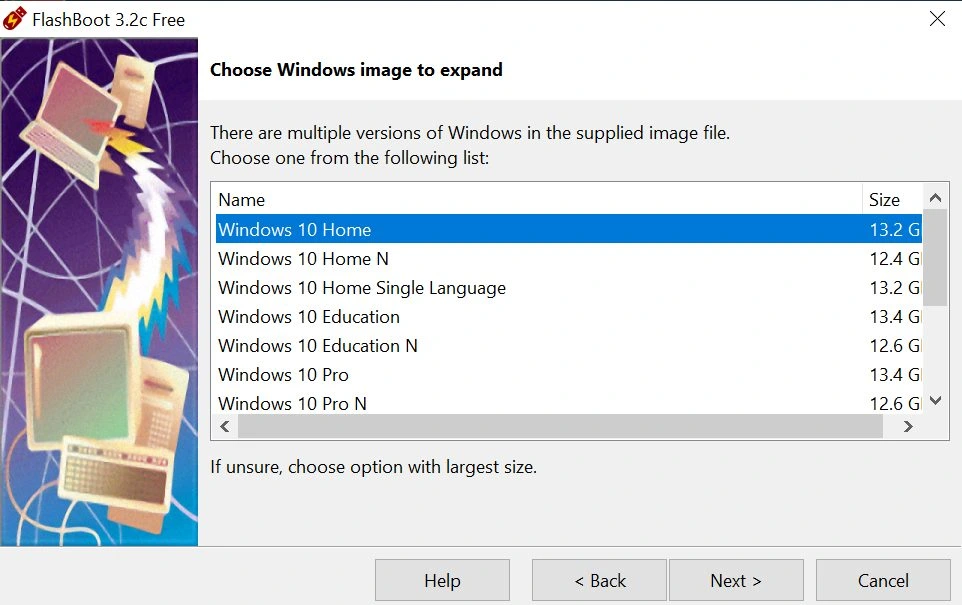
In the next window, Flashboot detects all versions of Windows that can be installed with the disk image you submitted to it. Select the version of Windows you want to use for your Windows To Go USB stick (for which you have a license key) and click Next.
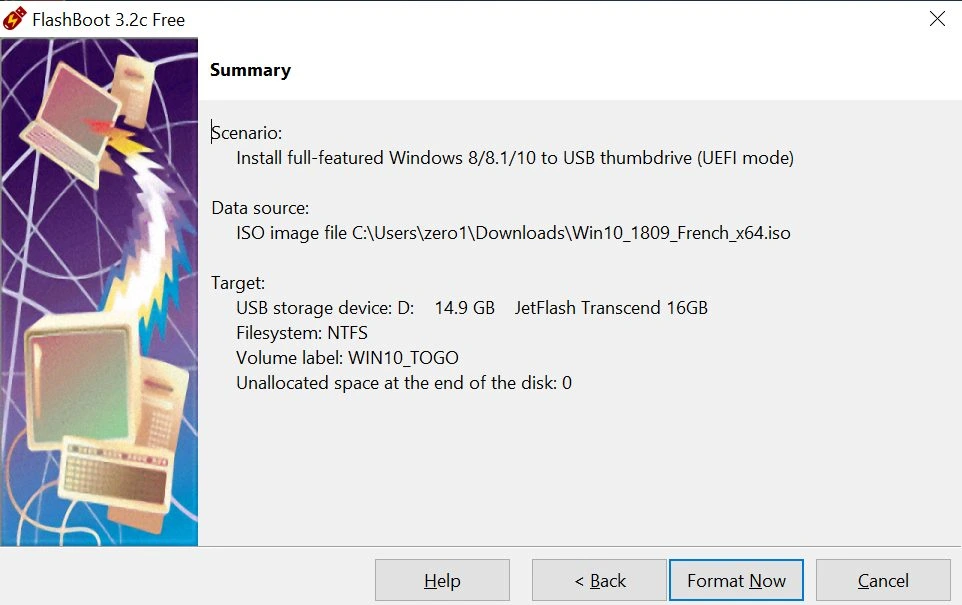
From the drop-down menu that appears, select the removable media to use when creating your Windows To Go USB Flash Drive. You can, if you wish, customize the USB media name or leave it as is. Check all your settings in the summary window by clicking Next.

Finally, click Format Now to start the Windows installation process on the USB drive. Depending on the writing performance of your USB media, the installation process can take several tens of minutes or even several hours. Be patient and let the software run until the installation is complete.
5.Allow your PC to boot on a Windows To Go USB drive
Click the start menu of the PC on which you want to use your Windows To Go USB key and then, in the search field, type Windows To Go. Click Windows To Go Start Options, then in the window that appears, select Yes, then click Save Changes (you must be logged into a machine admin account).

6.Change the boot order
Connect the USB stick to your computer, then when the PC starts, make sure it can boot onto an external device. To do this, you need to access your machine’s BIOS and change the order of priority when starting the machine. As handling may differ from PC to PC, refer to the Basic User Manual for instructions.
7.Boot Windows from USB
Once the computer is booted on the key, configure the operating system as you would on a new computer.
Summary
Windows To Go has been integrated for the first time in Windows 8. Creating a USB stick is possible with all versions of Windows. You will need a USB key with at least 32 GB of USB 3.0 storage space. The Flashboot utility is needed to install Windows on the USB stick. Choose the version of Windows you want to install on your USB stick.
You can customize the USB media name or leave it as is. Depending on the writing performance of your USB media, the installation process can take several tens of minutes or even several hours. Click Format Now to start the Windows installation process.

